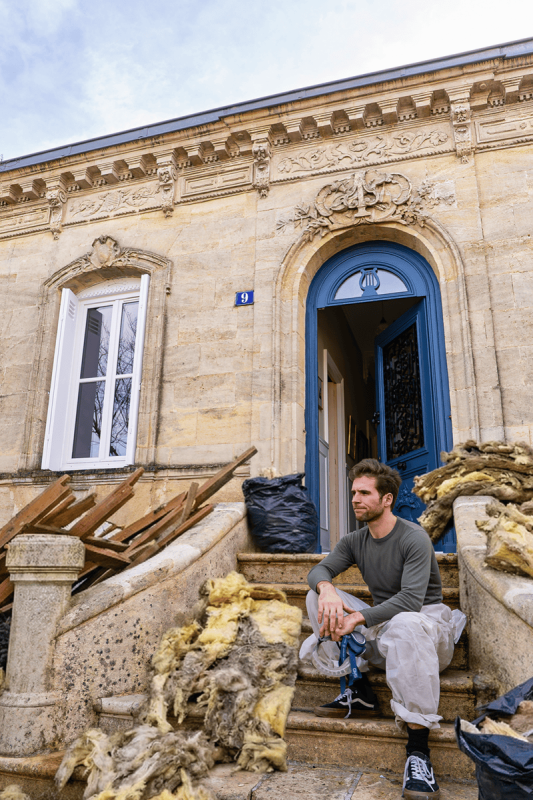
There are certain mornings that catch you completely off guard. You pull back the curtains expecting the usual grey winter drizzle, and instead you find the entire street blanketed in white. That is exactly what happened to us one January morning here in southwest France. Snow in Bordeaux. Actual, proper, settling-on-the-rooftops snow. If you have never lived in this part of the world, you might not understand why that is such a big deal, but trust us: it is an event rare enough that half the neighbourhood was outside in their pyjamas, phones in hand, capturing the moment before it melted away.
The novelty was wonderful. The reality, however, was rather less charming. Because as beautiful as our 19th-century chartreuse looked dusted in white, the inside of the house told a very different story. The cold had crept in everywhere. The stone floors felt like ice rinks, the living room was barely warmer than the garden, and no amount of cranking up the heating seemed to make a dent. It was the kind of bone-deep chill that anyone who has ever lived in an old French house will recognise immediately, and it was the wake-up call we needed to finally tackle a job we had been putting off for far too long: insulating under the floorboards from the cellar below.
Why We Had Been Putting Off the Cellar Insulation
Every old house comes with an impossibly long to-do list. When you are restoring a 19th-century property, you quickly learn that you cannot do everything at once. You have to triage. Some jobs are urgent, like making the roof watertight or getting the electrics safe. Others feel important but not critical, and insulating under the ground-floor floorboards from the cellar fell squarely into that second category for us.
We had already spent considerable time and effort insulating the external walls, and at the time we genuinely believed that would be sufficient. The logic seemed sound: if the walls are insulated and the windows are decent, the house should hold its heat. What we underestimated was the sheer thermal mass of the ground beneath an old house and the volume of cold air that can pour up through floorboard gaps from an uninsulated cellar. In a building like ours, with traditional timber joists sitting above a stone cellar, the floor is essentially a giant cold bridge. Warm air rises, cold air sinks, and your living room floor becomes a permanent refrigerator.
To make matters more complicated, we had already run all the new electrical wiring through the cellar ceiling. The cables were neatly clipped between the joists, following the routes we had so carefully planned during the rewiring phase. Going back in to insulate around all of that felt like a daunting prospect. Would we have to move cables? Would the insulation compress against the wiring and cause issues? These were the questions that kept the job on the “later” pile. But when you are standing in your living room wearing two pairs of socks, a jumper, and a blanket, and you can still feel the cold radiating up from the floor, “later” suddenly becomes “right now.”
Choosing Wood Fibre Insulation for an Old French House
One of the things we feel strongly about with this restoration is using materials that are sympathetic to the age and construction of the building. Old stone houses were built to breathe. The walls are thick, often made of limestone or a mix of rubble and lime mortar, and they manage moisture by allowing it to pass through rather than trapping it. This is fundamentally different from modern construction, which relies on vapour barriers and sealed cavities. If you start introducing modern, non-breathable insulation materials into an old building, you risk trapping moisture inside the walls and floors, leading to damp, mould, and eventually structural damage.
That is why we chose wood fibre insulation for the cellar project. Wood fibre, sometimes called “fibre de bois” in French, is a natural insulation material made from softwood that has been broken down into fibres and compressed into rigid or semi-rigid boards. It has several properties that make it particularly well suited to old buildings.
First, it is vapour-permeable. It allows moisture to pass through rather than trapping it, which means it works with the building rather than against it. This is absolutely critical in a 19th-century house where the entire structure relies on being able to manage moisture through evaporation.
Second, wood fibre has excellent thermal mass. Unlike lightweight insulation materials such as mineral wool or polystyrene, wood fibre absorbs and releases heat slowly. This means it does not just stop heat from escaping; it actually helps regulate the temperature inside the house, keeping it cooler in summer and warmer in winter. In a region like Bordeaux, where summers can be blisteringly hot and winters surprisingly cold, this dual benefit is enormously valuable.
Third, it is a sustainable material. It is made from renewable resources, it is recyclable, and its manufacturing process has a relatively low carbon footprint compared to synthetic alternatives. For a project where we are trying to be thoughtful about the choices we make, that matters to us.
The specific product we used came in semi-rigid batts that could be cut to fit between the joists. The batts are dense enough to hold their shape without additional support, but flexible enough to be trimmed with a standard insulation knife to accommodate the irregular spacing you inevitably find in old timber framing. No two joist spacings in our cellar are quite the same, because the house was built by hand nearly two centuries ago, and precision was measured rather differently back then.
The Insulation Process: Working in the Cellar
Hugo spent the best part of a week down in the cellar fitting the insulation, and it was not the most glamorous job in the world. The cellar has limited headroom, so much of the work was done in a permanent stoop or lying on his back on the stone floor. The lighting is not brilliant down there despite the new electrical circuits, and the air temperature in January was, shall we say, bracing. Add in the dust from cutting wood fibre batts and the general ambiance of a 19th-century cellar, and you have a task that requires a certain amount of determination.
The process itself was relatively straightforward, even if it was physically demanding. The first step was measuring each bay between the joists. As mentioned, the spacings are not uniform, so every piece of insulation had to be individually measured and cut. Hugo would measure the width at several points along each bay, because the joists are not always perfectly parallel, cut the batt slightly oversize, and then friction-fit it into place. The slight oversize is important: you want the insulation to press firmly against the joists on either side so there are no gaps for cold air to bypass.
The existing electrical cables did complicate things, but not as badly as we had feared. In most cases, the cables sat close to the underside of the floorboards, so the insulation could be fitted beneath them without disturbing anything. In a few spots where cables crossed the middle of a joist bay, Hugo carefully worked the insulation around them, splitting the batt where necessary to accommodate the cable run. The key principle was to maintain as continuous a layer of insulation as possible without compressing it, since compression reduces the thermal performance.
Where the insulation sat in the lower part of deeper joist bays, Hugo used some thin timber battens tacked to the underside of the joists to hold the batts in place. This is a simple and effective solution: the battens prevent the insulation from sagging over time due to gravity, and they are easy to remove if you ever need to access the wiring above. In shallower bays, the friction fit alone was sufficient to keep everything secure.
The whole process took about five days, working methodically from one end of the ground floor to the other. It is the kind of job where progress feels slow at first, but once you get into a rhythm of measure, cut, fit, move on, it becomes almost meditative. Almost.
The Immediate Difference in Comfort
We are not going to pretend that insulating the cellar ceiling has transformed our house into a tropical paradise. It is still a 19th-century stone building in the middle of a French winter. But the difference is genuinely noticeable, and it was apparent almost immediately.
The most obvious change is underfoot. Before the insulation, walking across the living room floor in winter felt like walking on a cold stone slab, because effectively that is what was happening: the floorboards were conducting the chill straight up from the uninsulated cellar below. Now, the floor feels neutral. Not warm exactly, but no longer actively cold. That might sound like a small thing, but when you spend all day at home working on a house renovation, not having frozen feet is a genuine quality-of-life improvement.
The second change is how quickly the rooms heat up and how long they hold their warmth. Previously, we would turn the heating on and it would take ages to bring the living room up to a comfortable temperature, and the moment the heating went off, the warmth would drain away through the floor like water through a sieve. Now, the rooms warm up faster and stay warm for significantly longer. We have not done precise measurements with a thermal camera or anything scientific like that, but the subjective difference is clear enough that we both noticed it independently.
The third benefit, which we had not anticipated, is a reduction in draughts. Old floorboards have gaps between them. It is just the nature of timber that has been in place for a century and a half: it shrinks, it moves, and gaps open up. Previously, cold air from the cellar would flow up through those gaps, creating a subtle but persistent draught across the floor. With the insulation now blocking that airflow, the draught has largely disappeared. The air in the room feels calmer, if that makes sense.
We keep saying it, but the lesson is clear: if you have an old house with a cellar or crawlspace beneath the ground floor, insulating from below should be high on your priority list. We wish we had done it sooner.
A Note on Insulating Old Houses Thoughtfully
While we are on the subject, it is worth saying a few words about the general approach to insulating historic buildings, because it is an area where well-intentioned mistakes can cause real problems.
The temptation when you feel the cold in an old house is to throw modern insulation at the problem as aggressively as possible. High-performance foam boards, spray foam, thick layers of mineral wool wrapped in plastic membranes: these are all products designed for modern construction, and they work brilliantly in that context. But in an old building with solid stone walls, lime mortar, and timber structures, they can do more harm than good.
The issue comes down to moisture management. Old buildings handle moisture through a process of absorption and evaporation. The stone walls absorb rain and ground moisture, and the lime mortar and internal plaster allow that moisture to evaporate to the inside and outside. It is a slow but effective system that has kept these buildings standing for centuries. When you seal up parts of that system with non-breathable materials, you interrupt the moisture cycle. Water gets trapped, timber starts to rot, mortar breaks down, and you end up with a building that is actually in worse condition than before you “improved” it.
This is why breathable materials like wood fibre, hemp lime, sheep’s wool, and cork are so important for old building insulation. They add thermal performance without compromising the building’s ability to manage moisture. They cost more than synthetic alternatives, and they often have slightly lower insulation values per centimetre of thickness, but the trade-off is absolutely worth it for the long-term health of the building.
If you are planning insulation work on an old property, we would strongly recommend consulting with a specialist in historic building conservation before making material choices. What works for a modern timber-frame house is not necessarily what works for a 200-year-old stone chartreuse, and getting it wrong can be expensive to fix.
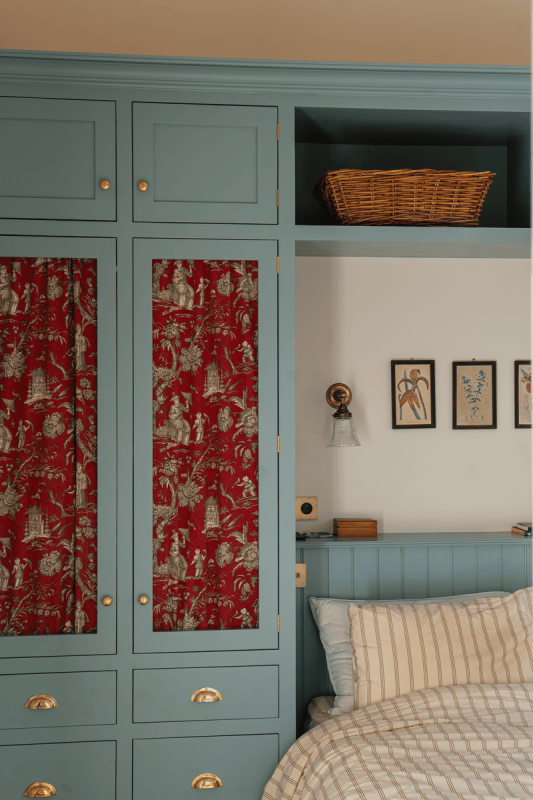
Meanwhile Upstairs: Handmade Cushion Covers from Vintage Fabric
While Hugo was busy in the cellar with his insulation batts and timber battens, the upstairs of the house was getting a rather different kind of attention. One of the things about a long renovation is that you can spend months, even years, focused entirely on the structural and practical work: walls, floors, wiring, plumbing, insulation. It is all essential, but it can leave the house feeling like a building site rather than a home. So whenever there is an opportunity to add a small touch of comfort or beauty, it feels important to take it.
This year, one of the personal goals has been to improve at sewing. It is a skill that feels deeply connected to the spirit of what we are doing here: making things by hand, reusing and repurposing materials, creating something personal rather than buying something mass-produced. And there is a wonderful tradition in France of vintage fabric markets where you can find the most extraordinary textiles, from old linen sheets with hand-embroidered monograms to offcuts of toile de Jouy and faded floral cottons that have a patina no new fabric can replicate.
A few months ago, at one of the brocante markets that pop up regularly around Bordeaux, a small collection of fabric scraps caught our eye. There were some beautiful pieces: a heavy linen in a soft stone colour, a faded blue stripe that looked like it might once have been ticking, and a lovely piece of printed cotton with a traditional French provincial pattern. They were not large pieces, but they were more than enough for cushion covers.
Making cushion covers is, in theory, one of the simpler sewing projects. You are essentially making a fabric envelope. But the devil, as they say, is in the details. A plain cushion cover is straightforward. A cushion cover with contrasting piping around the edges is a different proposition entirely.
Piping involves making a long strip of bias-cut fabric, wrapping it around a cord, and then sewing that corded strip into the seam between the front and back panels of the cushion. When done well, it gives a beautifully crisp, professional finish that frames the cushion and adds a subtle design detail. When done by someone who is still learning, it can be an exercise in frustration.
The main challenge is getting the piping to sit evenly all the way around, especially at the corners. You have to clip the seam allowance of the piping strip at each corner so it turns neatly, and if your clips are not quite right, or your stitching wanders even slightly, you end up with corners that are rounded when they should be sharp, or bunched up when they should be flat. The first cushion was definitely a learning experience. The piping was a bit wobbly in places and one corner had a distinct pucker that no amount of pressing could quite fix.
But here is the thing: it was handmade. It was made from beautiful old fabric that has a story behind it. And when you put it on the sofa in your living room, in a house that you are restoring with your own hands, it fits. Perfection is not really the point. The point is creating something with care and intention, learning a new skill, and making your home feel a little more like yours.
By the third cushion, the piping was noticeably neater. The corners were crisper and the stitching was more consistent. Practice, it turns out, actually does help. There are still more cushions to make, more techniques to try, and probably many more wonky corners ahead, but the living room is already starting to feel cosier and more personal, which was the whole idea.
The Bigger Picture: Small Comforts in a Long Renovation
Renovating an old house is a marathon, not a sprint. We have been at this for a while now, and there are still so many jobs ahead of us. Some are big, structural, expensive projects that will take months. Others are small, satisfying tasks that can be done in an afternoon. The trick, we are learning, is to balance the two.
If you spend all your time on the big, difficult, invisible work, like insulation, wiring, and plumbing, you can start to feel like you are never making progress. The house still looks like a building site, you are still living in chaos, and the finish line feels impossibly far away. That is when the smaller projects become so important. A new set of cushion covers, a freshly painted door, a shelf put up in the right place: these things make an outsized difference to how the house feels to live in, and they give you the psychological boost you need to keep going with the harder stuff.
Equally, if you focus only on the cosmetic details and ignore the fundamental work, you end up with a house that looks lovely but is freezing cold, leaking, or slowly deteriorating behind its pretty surfaces. The insulation work in the cellar is a perfect example: it is completely invisible, nobody will ever see it, but it has made a tangible, daily difference to our comfort and our heating bills. That is the kind of work that actually matters in the long run.
This week felt like a good balance of both. One of us was in the cellar doing essential but unglamorous work that will pay dividends for years to come. The other was upstairs making something beautiful from old materials that adds warmth and personality to the home. Between the two, the house is a little bit better than it was last week, and that is really all you can ask for.
Snow in Bordeaux: A Rare and Beautiful Interruption
We cannot finish without circling back to the snow, because it really was something special. Bordeaux has a mild oceanic climate, heavily influenced by the Atlantic. Winters are typically wet, grey, and cool, but not especially cold. Temperatures rarely drop below freezing for more than a night or two, and significant snowfall is genuinely unusual. Some years it does not snow at all. When it does, it rarely settles for more than a few hours.
So when we woke up to a proper covering, maybe three or four centimetres, enough to transform the garden and the street into a winter postcard, it felt like a gift. The chartreuse looked extraordinary: the old stone walls, the slate roof, the bare branches of the plane trees all picked out in white. The neighbourhood, which is usually so quiet in the early morning, came alive. Children were out making snowballs, dogs were bounding through the unfamiliar white stuff, and grown adults were grinning like children as they photographed their snow-covered cars.
It did not last, of course. By mid-afternoon the temperature had crept back above zero and most of the snow had turned to slush. But for those few hours it felt magical, a reminder that even in the middle of a long, hard winter of renovation work, there are moments of unexpected beauty that make you stop and appreciate where you are and what you are doing.
And then the magic wore off, the house got cold again, and Hugo went back down to the cellar with his insulation knife. Because that is the reality of old house renovation: beauty and hard work, hand in hand, one day at a time.
If you want to see the full cellar insulation process in action, along with the cushion-making adventures and that beautiful Bordeaux snow, head over to our latest video. We would love to hear your thoughts, especially if you have tackled cellar insulation in your own old house. What materials did you use? Did you notice a big difference? Drop us a comment and let us know.