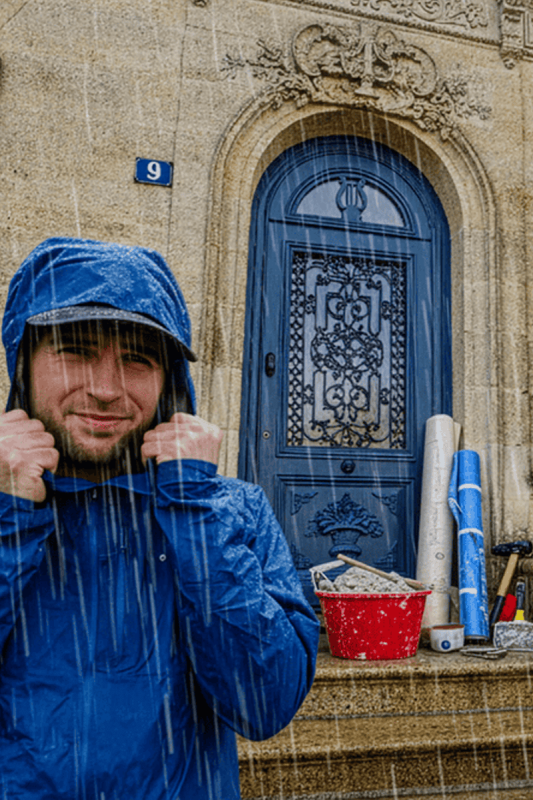
After more than two years of finding excuses, we finally committed to the job we had been dreading most in this entire renovation: stripping out every last piece of old insulation from our attic. It was filthy, physically exhausting, and at times genuinely unpleasant, but it marked the true beginning of what will eventually become one of the most important transformations in our old French chartreuse. In this post, we want to walk you through everything that happened, why we made the decisions we did, and what we learned along the way, because if you are tackling a similar project in an older property, the details really do matter.
Why We Put Off the Attic for So Long
When we first bought our chartreuse near Bordeaux, we knew the attic needed attention. The space was technically habitable, with a couple of rooms roughed in under the eaves, but the conditions up there were far from ideal. In summer the heat was stifling, often reaching temperatures that made the rooms entirely unusable. In winter, whatever warmth the house generated seemed to rise straight through the ceiling and disappear into the roof space. The insulation, we knew, was old and underperforming. But with so many other pressing jobs around the property, from stabilising walls to fixing plumbing to making the ground floor liveable, the attic kept sliding further down the priority list.
There was also a psychological barrier. We had peeked under the insulation early on and seen enough to know that the removal process was going to be truly unpleasant. The old material was a glass fibre type installed back in the 1990s. Over three decades, it had degraded considerably, compressed in places, and gathered an extraordinary amount of dust and debris. And then there was the evidence of rodent activity, which we will politely gloss over but which made the prospect of spending days up there in close proximity to it all the less appealing.
Still, you can only delay the inevitable for so long. We had reached the point where every other improvement to the house was being held back by the state of the attic. The new insulation could not go in until the old material came out. The new plasterboard walls could not go up until the battens were fitted. And the battens could not be fitted until we could see and assess the rafters properly. Everything led back to this one dirty, dusty, thankless task. So we picked a week, steeled ourselves, and got on with it.
What Was Up There: Glass Fibre Insulation from the 1990s
The insulation we found was a fairly standard glass fibre product, the kind that was widely used across France and the UK throughout the 1980s and 1990s. At the time it was installed, it would have been considered a perfectly reasonable choice. Glass fibre, also known as fibreglass, is lightweight, relatively cheap, and offers decent thermal resistance when new. On paper, it should have done the job.
The problem is that glass fibre does not age gracefully, particularly in a roof space that sees significant temperature variation. Over the years, the material compresses under its own weight and loses loft, which directly reduces its insulating effectiveness. Moisture from condensation can accumulate in the fibres, further degrading performance and creating conditions that encourage mould growth. In our case, the insulation had also been disturbed and displaced by rodents creating nesting sites throughout the material. Entire sections had been pushed aside, torn apart, or contaminated.
The result was an attic that was essentially uninsulated in large patches and poorly insulated everywhere else. The thermal performance was abysmal. We had noticed this from the very beginning, of course, with the oppressive summer heat and the winter chill, but seeing the state of the material up close confirmed just how bad things had become. There was no option to patch or supplement what was there. It all had to come out.
The Removal Process: Dirty, Dusty, and Deeply Satisfying
We will not sugarcoat this: removing the old insulation was one of the least enjoyable jobs we have undertaken in the entire renovation, and we have done some truly grim work over the past few years. The combination of decades-old dust, degraded glass fibres, and rodent contamination meant we had to take protective equipment seriously. Full body suits, FFP3 masks, sealed goggles, and gloves were essential throughout. Glass fibre particles irritate the skin, eyes, and lungs, and given the contamination from rodent droppings, respiratory protection was not optional.
The process itself was straightforward but laborious. Working in the confined spaces under the eaves, we pulled the old insulation away from between the rafters and packed it into heavy-duty waste bags. The material was surprisingly heavy once compressed into bags, far heavier than you might expect given how light and fluffy it appears when first installed. Each bag had to be carefully sealed and then carried down from the attic, through the house, and out to the car for transport to the local waste facility, the dechetterie as it is known in France.
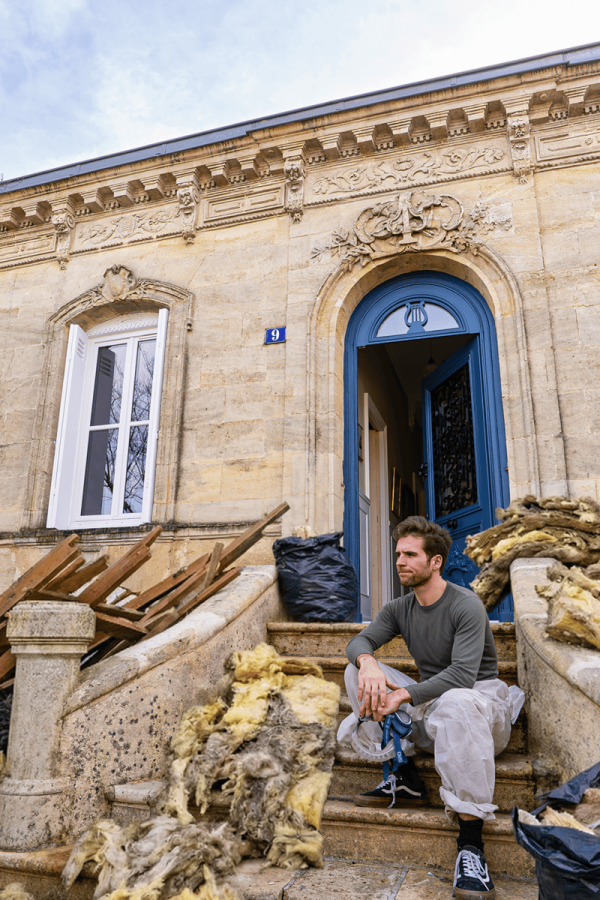
The number of trips we made to the tip was staggering. We lost count somewhere around the tenth journey, each one with the car loaded to capacity with bulging bags of contaminated insulation. The staff at the dechetterie must have been wondering what on earth we were doing. By the time we had finished, we had cleared several cubic metres of old material, and the attic was entirely stripped back to bare rafters and roof boards for the first time in over thirty years.
Exhausting as it was, there was a genuine sense of satisfaction when the last bag left the house. We stood up in the attic and could see the full structure of the roof clearly for the first time. The space felt entirely different, open and full of potential. We could finally begin to plan the next phase properly, with a clear view of what we were working with.
Inspecting the Rafters: A Moment of Worry
With the insulation stripped out, we had an opportunity that we had not had since purchasing the property: a full, unobstructed inspection of every rafter, every joint, and every section of the roof structure. This is one of the hidden benefits of a complete strip-out. You get to see things that have been concealed for decades, and sometimes what you find is reassuring, and sometimes it is not.
Most of the roof structure looked to be in excellent condition. The oak rafters, original to the house, were solid and dry, with no signs of significant degradation. The roof itself had been redone at some point before we bought the property, and the underside of the new roofing felt and battens looked clean and well-installed. So far, so good.
But in one area, tucked away in a corner where two roof slopes met, we found something that made our hearts sink: a patch of dark discolouration on the timber that looked unmistakably like mould. For anyone renovating an old property in France, the word that immediately springs to mind in that situation is merule, or Serpula lacrymans to give it its scientific name. This is a particularly aggressive form of dry rot fungus that is a genuine menace in older French buildings. It thrives in damp, poorly ventilated conditions and can cause catastrophic structural damage to timber in a remarkably short period, sometimes just a few years. Once established, remediation is expensive, disruptive, and sometimes requires the removal and replacement of entire structural elements.
We have heard horror stories from other renovation projects in the region. Properties where merule was discovered too late, where floors collapsed, where entire roof structures had to be rebuilt. It is, without exaggeration, one of the most feared problems in French property renovation, and for good reason. Insurance companies take it extremely seriously, and a confirmed case of merule can have significant implications for the value and insurability of a property.
So when we saw that dark patch on the timber, our first reaction was a cold knot of anxiety. We photographed it, examined it closely, and tried to assess whether the wood felt soft or compromised. It did not seem actively wet, and the wood felt firm to the touch, but we knew that visual inspection alone was not sufficient to rule out merule. We needed an expert opinion.
Getting an Expert Assessment
We contacted a specialist who deals with timber pathology in older buildings, someone with specific experience of merule and other wood-destroying fungi common in the Bordeaux region. They came out within the week, which was fortunate because the days between making the call and getting the assessment were not exactly relaxing.
The expert examined the affected area carefully, took samples, and assessed the moisture levels in the timber and surrounding structure. Their verdict was enormously reassuring. The discolouration was almost certainly the result of historic water damage, likely from a period before the roof was replaced. At some point in the past, water had been getting in at that junction, probably for an extended period, and had stained and superficially affected the timber. However, since the roof had been redone, the area had been completely dry. There was no active fungal growth, no spore production, and no structural compromise of the wood.
Crucially, it was not merule. The pattern of staining and the condition of the wood were inconsistent with an active or even dormant merule infestation. The expert recommended we treat the area with a preventative fungicidal solution as a precaution, which we were happy to do, but confirmed that no further intervention was necessary.
The relief was immense. If there is one lesson we have taken from this experience, it is that you should never ignore suspicious marks on structural timber in an old French house, but equally, you should not panic until you have had a proper professional assessment. Many things can cause dark staining on wood, and not all of them are cause for alarm.
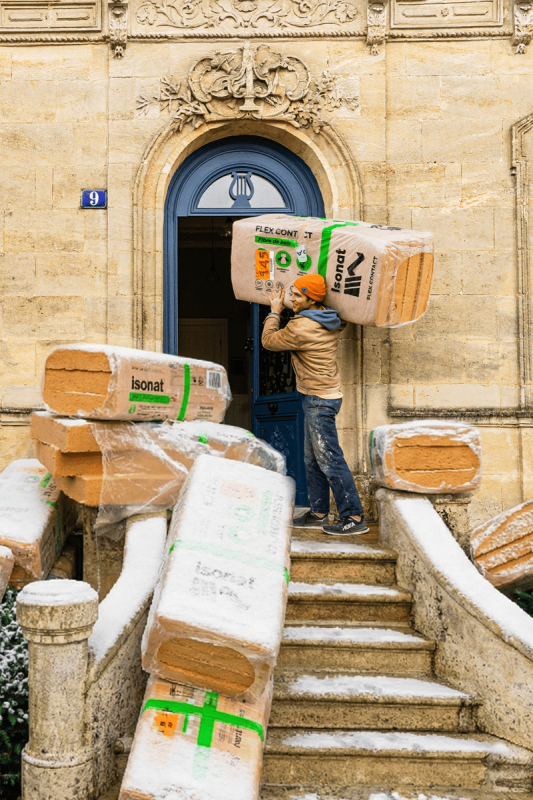
Why We Chose Wood Fibre Insulation
With the old insulation removed and the roof structure confirmed as sound, our attention turned to what would replace it. We had done extensive research into insulation options over the preceding months, and we had settled on wood fibre insulation, known in France as fibre de bois. This was not an arbitrary choice. For a house of this age and construction type, we believe it is the best option available, and here is why.
Old stone houses like our chartreuse were built to breathe. The thick stone walls, the lime-based mortars, the timber structures, all of these elements allow moisture to move through the building fabric in a way that modern construction does not. This breathability is not a flaw; it is a fundamental part of how the building manages moisture and maintains a healthy internal environment. When you introduce modern, non-breathable materials into an old building, you risk trapping moisture within the structure, which can lead to damp problems, timber decay, and the very conditions that encourage fungi like merule to take hold.
Wood fibre insulation is a vapour-permeable material. It allows moisture to pass through it rather than trapping it, which means it works in harmony with the existing building fabric rather than against it. This is absolutely critical in a renovation context. We have seen too many old French properties where well-meaning owners have installed modern synthetic insulation or vapour barriers and inadvertently created serious damp and rot problems as a result.
Beyond breathability, wood fibre has another significant advantage that is particularly relevant to our attic: its thermal mass. Unlike lightweight insulation materials such as glass fibre or mineral wool, wood fibre has a relatively high density and thermal mass. This means it does not just resist the passage of heat; it actually absorbs and stores heat energy before releasing it slowly. In practical terms, this creates a significant time delay, known as thermal phase shift, between when heat hits the outside of the roof and when it reaches the interior.
For an attic space under a south-facing roof in the Bordeaux region, where summer temperatures regularly exceed 35 degrees Celsius and the roof surface can reach far higher temperatures, this thermal phase shift is transformative. With glass fibre insulation, the heat passes through relatively quickly, and by mid-afternoon the attic becomes unbearably hot. With a sufficient thickness of wood fibre, the peak heat is delayed by many hours, often until the evening when outside temperatures have already dropped and the heat can be ventilated away. The result is a dramatically more comfortable living space in summer, without any need for energy-hungry air conditioning.
Wood fibre insulation also performs well acoustically, is made from renewable resources, has a low embodied energy compared to many alternatives, and is pleasant to handle during installation, something we were particularly appreciative of after our experience with the old glass fibre. It does not irritate the skin or lungs and does not require the same level of protective equipment. The boards and batts cut cleanly with a standard handsaw and fit snugly between rafters.
The main disadvantage is cost. Wood fibre insulation is more expensive than glass fibre or mineral wool, sometimes significantly so depending on the thickness required. For our attic, the material cost was a meaningful part of the renovation budget. But we considered it a long-term investment in the comfort, health, and structural integrity of the house, and one that we are confident will pay for itself many times over in reduced energy costs and a more usable living space.
Preparing for the Next Phase: Battens, Rails, and Complicated Geometry
With the strip-out complete and our insulation choice confirmed, the next step is to install the framework of battens and rails that will hold everything in place. The new wood fibre insulation boards will sit between the rafters, held in position by the battens, and the plasterboard that will eventually form the finished walls and ceiling of the attic rooms will be fixed to the same framework.
This is where the project gets technically challenging. Our attic has four sloping walls that follow the pitch of the roof, with dormers, junctions, and angles that are anything but straightforward. None of the walls are a simple flat plane. Each one slopes at the roof pitch, and where they meet the floor and the ridge, the angles need to be calculated and cut precisely. Add in the dormers, which create their own set of internal angles and transitions, and you have a geometry puzzle that would test anyone’s patience.
We need to ensure that the batten framework creates a consistent plane for the plasterboard, that there is adequate depth for the insulation thickness we want to achieve, and that any services such as electrical cables and lighting points are accommodated within the structure. All of this needs to be planned before a single batten is fixed, because mistakes at this stage are extremely difficult and expensive to correct later.
We have been spending time with our tape measure, spirit level, and a considerable amount of graph paper, mapping out each wall and calculating the batten positions. It is slow, meticulous work, but it is the kind of preparation that makes the difference between a professional-looking result and a frustrating mess. We will be sharing the full process in our next update, including whatever mistakes we inevitably make along the way.
A Visit to the Oldest Market in Bordeaux
Renovation work is relentless if you let it be, so we made sure to take a break during this period and visit the Marche des Capucins, widely regarded as the oldest and most authentic market in Bordeaux. Known locally as the belly of Bordeaux, the Capucins market has been operating in one form or another since the early eighteenth century, and it remains a vital part of the city’s food culture today.
Unlike some of the more tourist-oriented markets in the city centre, the Capucins has a wonderfully down-to-earth atmosphere. The stallholders are passionate and knowledgeable, the produce is exceptional, and the prices are fair. We wandered through the covered halls taking in the extraordinary displays of fresh seafood, charcuterie, cheeses, fruit, and vegetables. The oyster bars, where you can stand and eat freshly shucked oysters from Arcachon with a glass of white wine at ten in the morning, are a particular highlight and a quintessentially Bordelais experience.
Visits like this remind us why we fell in love with this region in the first place, and why the hard, dirty work of renovation is worth it. We are not just restoring a building; we are building a life in a place that has an extraordinary relationship with food, wine, and the simple pleasures of daily existence. The market trip recharged our batteries and sent us back to the insulation removal with renewed enthusiasm, or at least a slightly better attitude.
Lessons Learned from the Attic Strip-Out
Every major job in a renovation teaches you something, and this one was no exception. Here are the key takeaways from our attic insulation removal that might be useful if you are facing a similar project.
Do not underestimate the scale of the waste. Old insulation takes up far more space in bags than you expect, and it is heavier than it looks. Plan for multiple trips to the tip and make sure you have a vehicle that can handle the load. If you are dealing with large quantities, it may be worth hiring a skip or arranging a bulk collection.
Invest in proper protective equipment. This is not a job where a basic dust mask and a pair of rubber gloves will suffice. FFP3 masks, sealed goggles, disposable overalls, and proper gloves are essential, particularly if you are dealing with old glass fibre or any suspicion of rodent contamination. The cost of proper PPE is trivial compared to the potential health consequences of inhaling decades-old dust and fibres.
Use the opportunity to inspect everything. A complete strip-out gives you access to parts of the building you may not see again for decades. Take the time to inspect every rafter, every joint, every section of roof boarding. Look for signs of water damage, insect activity, fungal growth, or structural movement. Photograph everything. If anything concerns you, get a professional opinion before covering it back up.
Research your replacement insulation carefully. The cheapest option is rarely the best option, particularly in older buildings. Consider the breathability, thermal mass, and compatibility of the insulation with your building type. Talk to specialists who understand old construction methods, not just modern building regulations. The right insulation choice can transform a space; the wrong one can cause serious long-term problems.
Do not rush the preparation for the next stage. It is tempting, once the strip-out is done and the space is clear, to want to start installing new materials immediately. Resist that urge. Take the time to plan your batten layout, check your measurements twice, and make sure you understand the geometry of the space before you start fixing things in place. Patience at this stage saves enormous amounts of time and frustration later.
What Comes Next
The attic renovation is now properly underway, and we could not be more excited about where it is heading. The next phase, fitting the battens and rails, will be the subject of our next update. After that comes the insulation installation itself, then the plasterboard, then the finishing work. There is a long road ahead, but every step brings us closer to having a beautiful, comfortable, and properly insulated attic space in our chartreuse.
If you are following along with our renovation journey, thank you. Your support, comments, and encouragement mean more to us than we can say. Restoring an old house is a marathon, not a sprint, and knowing that there are people out there who are interested in the process and rooting for us makes the hard days a little easier.
We will see you in the next one.